Showing posts with label Newbie. Show all posts

Tuesday, May 9, 2017

Water Out Of The Campground Faucet, YUCK!!

Well,  I suppose that most of you enjoy Artesian spring water with just a touch of Evian for good taste at your campground.  I know I do. NOT!!  While most city water is ok (well some is less than ok but just barely drinkable). Most campground water is not even ok but is drinkable.  With just a little bit of  DIY skills, you can improve your drinking, cooking, and shower water to be something to be proud of.  Enter the RV water filtration system.


Let's look at the simplest of these non-RV filtration systems and see what makes it filter.  The carbon/charcoal filter is the simplest of the non-RV water filters.  The filter holder can look like this
Culligan HF-150A Filter Holder
So how do you hook this blue thingy up to your RV?  You will need a few more simple parts.  The input and out put of the holder is 3/4" so any big box DIY store will have the needed plumbing parts.
You will need 3/4" Garden Hose to 3/4" Brass Coupler/Adapter  it looks like this
3/4" Garden Hose to 3/4" Brass Coupler/Adapter
This screws into the filter holder and allows the drinking water hose to hookup to it. (this attaches to the output of the filter holder)

For the input of the filter you will need a Female hose to Male pipe  It will look like the following.
Female hose to Male pipe 
You can mount the filter holder to the rig or you can just set it on the ground.  If you want to mount it you will need a Filter Mounting Bracket The filter mounting bracket will look like this.
Filter Mounting Bracket
You can use the bracket if you wish or just sit the filter canister on the ground.  Next, comes the Drinking Water Filter with Carbon  The filter comes in a two pack and looks like below.
 Drinking Water Filter with Carbon

So you are saying to yourself  why do I want to DIY this type of project when I can just go and buy one of these,
RV Water Filter

The answer is, that once the big blue filter is put together, you can get two of the filter replacement cartridges for big blue for less than one of the above filters.  Also, there is the chance of bacterial build up because, unless you are a full timer you are not using the filter enough.  With the replacement cartridges, you can just take it out and throw it away and use a new one next time you go out and you will still be saving money.

But wait there is more.
What if we add a second big blue filter?  Would we gain anything?  You bet.  So let's do it.

The two stage filter
For a two stage filter, you will need everything we listed for the one stage filter plus a 3/4" Brass Nipple that looks like this,
3/4" Brass Nipple - Length you must determine
You will need to measure the length that the nipple must be and buy one from one of the Big Box DIY stores. This nipple will be used between the blue filter cans and the other fittings will be the input and the output of the filters just as before.  You now have a chance to increase the filtering of your drinking water.  Now you will start to use Sediment Replacement Filter which looks like this,
Sediment Replacement Filter
A sediment filter gets rid of: sand, silt, dirt, rust particles and scale particles The park water should come into this filter first, then go through the Drinking Water Filter with Carbon and finally into your rig.  So now we are done, right?  Not so fast RVer slow down and keep reading.

The Triple RV Filter
With this type of filter system, you have the best possible filter system for still not a lot of money.  So what do you need?  Everything listed above plus an additional 3/4" Brass Nipple of the correct length to go between two more blue filter canisters.  Plus one more special type sediment filter the Special RV Filter which looks like this,
Special RV Filter

This special filter goes just before the Drinking Water Filter.  I know this looks like a lot of work but it really is not.  It is just a lot of hooking up of pipes to plastic.  You will need some Plumbers White Tape which looks like this,
Plumbers White Tape 
I would suggest getting several rolls as the tape tends to tangle and get wasted.  You will want to check for leaks after assembly by hooking up your filter system and be sure to let the water from the filter system to run on the ground for five minutes or until the water is running clear.  Some black pieces of carbon may come out onto the ground and this is normal.
Mounting the filters
You can use a 2"X 4" (2x4) of the length you need and mount the filter holders to that as a way of keeping them corralled together or you could mount them in one of the service bays on the rig. It is up to you.
The water you will get from the triple filter has to be drunk to be believed.  This system will not take pond water or salt water and make it drinkable.  This will, however, make city treated or treated well water taste just great.  And the wife's ice tea will be out of this world.


Until next time


And finally, please remember that this blog is an Amazon affiliate. When you order something through any of the Amazon links, it doesn’t add anything to your cost, but I do earn a small commission on everything you buy. Just click on an Amazon link, then shop as usual.

Friday, August 12, 2016

Martha!!! The String On The Blind Broke Again!!!

It happens to most of us,  we grab the shade bar at the bottom of the window blind and pull down to get ready for bed and the darn string running through the blind breaks and while it will go down all the way, there is no possible way that it will go up and stay where you want it in the morning. RATS now what?


RV Window Shade
Above is your typical RV window shade and if you look close you can see the string running through the blind material.  I suppose you could buy a RV Blind String Repair Kit, shown below


While the hours spent restringing the blind with your spouse may be enjoyable, you might want to consider the frustration of not getting it right even after the 5th attempt. 
My suggestion is to replace that blind with something that is a whole lot prettier and will class up the inside of your rig as simple as ABC.

There are two basic RV Blinds.  First the roller blind.  As the name implies it is on a roller and you pull it down to the level you want and the blind will stay there.  The roller blind comes with two blinds on the roller. One is the daytime shade and the other is the night time or black out shade.  The roller can be installed on the outside of the window frame or on the inside of the window frame and is offered in colors for the daytime and night time shade.
Roller Bind Shade


Measuring Instructions:
Determine if the shade will mount outside the window frame onto the wall (Outside mount) or if the shade will be mounted inside the window frame (Inside mount) 

NOTE: Most RV applications are Outside mount.
Outside mount: Measure the width (across) of the area to be covered.Example - Edge of the window to the edge of window plus 2" added for additional coverage.
Example: Top of the  frame to  the bottom of  the frame with an additional 2" added for mounting above and below  the window.(outside mount)
Inside Mount: Measure the exact opening size and subtract a half inch. Measure the length (Drop) of the area to be covered.
If draperies or valances are already installed be sure your measurement for width allows the shade to fit under the current window treatment.
You can see that you end up with two shades one for daytime and one for night time.  You may find that this is not really what you are looking for and would rather have a true Vinyl 1 Inch Mini Blind.
Vinyl ! inch mini Blind
Measuring Instructions:
Determine if the blind will mount outside the window frame onto the wall (outside mount) or if the blind will be mounted inside the window frame (inside mount)  
NOTE: Most RV applications are outside mount.

Outside mount: Measure the width (across) of the area to be covered.  
Example - Edge of  the window to the edge of window plus 2" added for additional coverage.
Example: Top of the frame to the bottom of  the frame with an additional 2" added for mounting above and below  the window.(outside mount)
Inside Mount: Measure the exact opening size and subtract a half inch. 
Measure the length (drop) of  the area to be covered.
If draperies or valances are already installed be sure your measurement for width allows the blind to fit under the current window treatment.

You can get wooden blinds or different color Vinyl blinds to match or enhance the inside appearance of your rig.  Metal blinds are not recommended because of moisture in the rig.  The edge of the blind tends to rust and the blinds are a bit sharp around kids and fur-babies.
Caution: if you remove blinds from your windows keep all screws that were used to be sure that you do not use a screw that is too long for your RV side walls.


Until next time.

The Open Range RV Owners is a Facebook Group on RVing with Hints & Tips. A group for the Full-timer as well as the Newbie. In case U can't find us "Facebook.com/groups/Open Range RV Owners" we are here hoping you will join us!

And finally, please remember that this blog is an Amazon affiliate. When you order something through any of the Amazon links, it doesn’t add anything to your cost, but I do earn a small commission on everything you buy. Just click on an Amazon link, then shop as usual.

Thursday, July 7, 2016

Well, What Did You Forget This Time?


Whether you are a new Full Timer, a Newbie, a Part Timer, or a Weekender we all seem to forget something vital to our RVing enjoyment or safety at the beginning of each season.  What do you really need to have to hook up your RV and have a safe but fun RVing experience? To find out I asked a bunch of Facebook RVers to give me a list of their most important, not to be forgotten, "must haves" for the RV before you pull out.  Here is the list in no particular order.


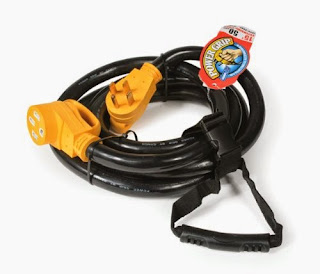
1. Power Cord to hook up the RV along with an extension cord. You need enough to go to either end of your RV.
http://amzn.to/1R7Y3vP
15 Ft 50 Amp Extension Cable
http://amzn.to/1bYJI4w
25-Ft 30 Amp Extension Cord

2.  An extension drinking water hose is a must.  You should have a 25-foot regular hose and a 25-foot extension.
http://amzn.to/1bYKQoC
25 Foot Drinking Water Hose

I make the assumption  that you already have a drinking hose with you.  If not, you are going to need one.  Get a 25 foot one for everyday use and another 25 foot as the extension. (I once stayed at a park where the water was on one side of the TT and the electric was on the other side of the TT.)

3. Another good thing to have is a Water Hose Splitter for the park supply line. That way if you  need some additional outside water you will not need to unhook the water supply to the rig.
http://amzn.to/1AATIH7
Plastic Water Hose Splitter
4. Extra sewer hose is a must these days.  With longer rigs you can't leave home without it.
http://amzn.to/1E2ycwr
10 Foot Sewer Hose Extension

5. In addition, to the hose extension you should also have a short clear section of sewer pipe to keep an eye on what is coming out of the sewer and to know when it is done draining.
45 Degree Clear Fitting
With the above fitting you can really see if that new RV TP really is quick dissolving.

6. In some States and in some RV Parks you must raise the sewer line off the ground.  It is the law.  There are lots of idea floating around but here is one of the simplest.  Remember in some States this is required.


7. If the park you are staying at has Cable TV you will need some TV cable to go from the Utility Box to the rig.
25 Ft RG6 Cable TV Wire
8. How about better tasting water?  Please read the Blog Post on "Water Out Of The Campground Faucet, YUCK!!" for all the best options but, here is just one.
RV Water Filter
9. A good tire pressure gauge is vital for any RVer.  A cheap one is not an option.  As always check your RV tires when Cold.
Good Digital Tire Gauge
10. Wheel Chocks are the next must have item.  Oh, the Horror Stories I could tell.  Get some Chocks.
RV Wheel Chocks for Pull Behind RVs.

11.  For reasons of safety and anti-theft I also recommend an X-Chock.
Locking Chock
12. A spare set of water hose washers is a good idea.
Water Hose Washers
13. And by all means an RV 30 or 50 amp (depending on your RV's power requirement) Power Management Protector (Surge Protector).

30 Amp Surge Protector
50 Amp Surge Protector


Just be sure to get one that works with your Rig.

14. A Water Pressure Flow Manager would be a good thing as well.  This limits the water pressure to your Rig to no more than 50 psi of water pressure in your RV's plastic water pipe system.  Much more than that and you might start to blow water fittings.

Water Pressure Regulator
Water Pressure Regulator With Meter

14.5 If you use a Water Hose Splitter, like number 3 above for cleaning out your RV sewer hose then you should have a water Back Flow Preventer like
This little unit attaches to the hose splitter and prevents and water hose connected to the open side of the hose splitter from leaking water back into the water source and contaminating it.  Like when you wash out the sewer hose or the spare hose falls into a puddle. 

15. Often times people will suggest that you take boards with you to level the Rig in a campsite that is not level.  While boards may work they add weight and can absorb water when left on the ground during rain.  Here is an alternative.
RV Ramp/Leveler


16. You will not want to forget some RV Dog Bones.  These adapters change your electrical hookups from one type to another.  For example from 50amp to 30amp.  Why because the campground only has 30amps. Please read "RV Dog Bones What Are They and How Are They Used" further down in this Blog for more details.
Adapt 50amp Plug to 30amp Plug

17. You should also carry a water hose for everything but drinking.  Wash the kids feet, flush the sewer hose, etc.  You get the picture.
General Duty Water Hose
18. You should also have a spray bottle of disinfectant to use on park water taps.
Spray Disinfectant

Feel free to add your Can't Be Left Behind" items to the comments area.


Until next time.

The Open Range RV Owners is a Facebook Group on RVing with Hints & Tips. In case U can't find us "Facebook.com/groups/Open Range RV Owners" we are here hoping you will join us!

And finally, please remember that this blog is an Amazon affiliate. When you order something through any of the Amazon links, it doesn’t add anything to your cost, but I do earn a small commission on everything you buy. Just click on an Amazon link, then shop as usual.

Monday, April 11, 2016

Keep Track Of Your Tire Pressure And Temperature

I read all the time that one of the biggest fears people have when RVing is a blown tire and the massive amount of damage that it can cause.  But I rarely read about a Fulltimer or a Newbie adding or adjusting a Tire Pressure Monitoring System (TPMS).  Why?  I doubt that every RV sold comes with a tire monitoring system. I just got back from one of the big RV shows and not one 5th wheel that I looked at came with a TPMS nor did a single salesman recommend a tire monitoring system during the sales presentation.  I also read that more than 60% of the RVs on the road today are overloaded or worse that the tire pressure on the RV is below the manufacturer's recommended tire pressure.  To make it worse [if that is possible] many of the  RVs going down the highway, are going at  70 mph or higher. Even though the RV's tires are marked not to exceed 65 mph.  As we get our RVs ready for another season of camping, let's look at what we need to do to be safer going down the road and monitoring our tires.  


1. 
You need to check the tire pressure when the tire is still cold


It has been shown, by an  infrared thermometer, that after only 10 minutes of Summer Sun, that the temperature of RV tires have risen above COLD and should not be measured for pressure and thought to be cold.  After you have driven 1 mile the RV tires are not considered cold and should not be tested for pressure as being cold. 

2.
When you stop for gas or a bathroom break, you should do a tire check of the RV as well as the tow vehicle. My daughter was checking the tow vehicle for me and found a large cut in the sidewall of the truck tire.  We were able to get the tire replaced before the large accident occurred.  I did not even remember hitting or running over anything on the highway.

3.
Before starting out on the RVing trip be sure to carefully look at the tread, and the side walls both on the front and the back of the tire.  Most RV tire experts agree that if your RV tires are more than five years old from the date of manufacture [shown in a code on the tire] you should replace them. 

4.
Most tire failures occur when the side wall of the tire is under inflated or rots out from the inside where you can not see. Remember you are riding on air, the tire just keeps the air captured and held in place.  You can thank Mr. Sun for sidewall failure in some cases.  Most tires have a Mr. Sun inhibitor built-in but when a tire sits and sits the inhibitor does not get moved to the outside of the tire by the tire going round and round.  Now you see why you need wheel covers right? Trailer Wheel Covers   for less than $25. 


OK, I have exposed you to some of the basic safety things you need to do, now let's look at those Tire Pressure Monitoring Systems.
A good system for monitoring your tire pressure as well as the tire temperature is the  Wireless Tire Pressure Monitoring System .


Wireless Tire Pressure Monitoring System

The system will tell you of an overheated tire, in most cases before it blows, and of course tell you of low pressure in any monitored tire, even the spare, in real time. 
  • Monitors up to 22 wheels (0-232 psi)
  •  Quickly reacts to abnormal pressure or temperature
  • Waterproof & Dustproof sensors; 
  • Customizable Tire Pressure Monitoring Criteria
  • Sensor Alarm system included; Locking Ring to Guard Against Theft
  • For use in RVs, SUVs, Caravans, Trucks, & Passenger cars


RV Flow-Through 6 Tire Sensor - Tire Pressure  Monitoring System (TPMS)


RV Flow-Through 6 Tire Sensor - Tire Pressure Monitoring System (TPMS)


  • The flow-through sensor with replaceable battery can be secured to prevent loss or theft
  • Portable monitor has rechargeable battery and monitors tire pressure 0-199 PSI & temperature
  • Monitor tires 24/7: low/high pressure, high temperature, and slow leaks.
  • Monitor warning thresholds are user adjustable; low-pressure alert level is per axle adjustable.
  • Tire sensor signals have excellent range and not require signal booster for most vehicles


As a lower cost alternative, you can use a screw-on tire pressure indicator, such as Quick-Pressure-PSI-50-Monitor, which at a glance can tell you that you may have a problem [use only if your tires are supposed to have 50 lbs of air when cold. Other pressures are available]  and the traditional pencil like gauge, such as Pencil-Pressure Gage .  


A low-cost way to check the tire and the tire hub temperatures is to use a non-contact  Infrared temperature gun.  Such as the HDE Non-Contact Infrared IR Temperature Gun Digital Thermometer

As you stop during your travels you can check the tire temperature and hub of each tire.  They should be with-in a few degrees of each other.  If you find a tire or hub that is very much higher than the rest you should take action to find out why before you proceed.

The first thing you should do is to check the air pressure of the tire that is over heating.  I know that you have been traveling awhile but the pressure in the HOT tire should be with-in a few pounds of the rest of the tires on the rig.  You might want to consider a digital tire pressure gauge such as the NorthONE Digital Tire Pressure Gauge.

Just be sure that the gauge you buy can read pressures above those that your tire is supposed to have in it.

To protect the tires in storage from Mr. Sun and any other nasties that come along.  You can also use an RV tire protective spray which is applied, as directed, to the tire side wall that is exposed to the sun.
I have used RV Tire Protection Spray with good luck.  This spray is not designed to make the tire side wall shinier, it is not a decorative spray, but something that is designed to put back into the surface of the rubber what Mr Sun is taking out.
RV Tire Protection Spray
Also note, that if you are going to store the RV for an extended period of time you should protect the tread of the tire from the surface that the tires are sitting on.  Nasty things can leach out of your tires into the blacktop or concrete that your RV sits on while being stored. Or from the blacktop or concrete into your tires during storage.  You can use an  Office Chair Carpet Protector 

as a way to protect your tires during storage.  It is an inexpensive solution to tire protection during storage.

I hope this better explains why it is important to know what is going on with your tires and also helps with the fear factor.


Until next time.

The Open Range RV Owners is a Facebook Group on RVing with Hints & Tips. A group for the Full-timer as well as the Newbie or Wanna B. In case U can't find us "Open Range RV Owners Group" we are here hoping you will join us!

And finally, please remember that this blog is an Amazon affiliate. When you order something through any of the Amazon links, it doesn’t add anything to your cost, but I do earn a small commission on everything you buy. Just click on an Amazon link, then shop as usual.